iPhone Data Recovery
 Phone to Phone Transfer
The easy 1-Click phone to phone data transfer to move data between iOS/Android/WinPhone/Symbian
Restore-iPhone-Data Products Center

 Android Data Recovery
The Easiest Android data recovery software to recover Android lost or deleted Files
 Phone Manager(TunesGo)
Best iOS/Android phone manager tool to manage your phone’s files in a comfortable place
 Phone to Phone Transfer
The easy 1-Click phone to phone data transfer to move data between iOS/Android/WinPhone/Symbian

iOS Toolkit
A full solution to recover, transfer, backup restore, erase data on iOS devices, as well as repair iOS system and unlock iPhone/iPad.

Android Toolkit
All-in-one Android Toolkit to recover, transfer, switch, backup restore, erase data on Android devices, as well as remove lock screen and root Android devices,especially Samsung phone.
HDR stands for High Dynamic Range. The dynamic range of a scene tells you how different the brightest parts of the scene (the highlights) are from the darkest parts of the scene (the shadows). HDR works to balance the shadows and highlights of a photo so that neither are being favored or ignored. This is done by combining three different exposures into a single shot.
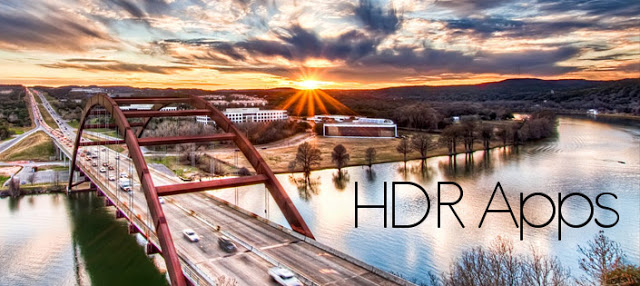
As stated, HDR stands for High Dynamic Range. But what does that really mean? It has to do with the differences in vision between the human eye and a camera. Dynamic Range in photography is the range from the lightest light and the darkest dark that can be seen in a photo. Our eyes can see a much larger dynamic range than a camera – and that’s where HDR comes in to make up the difference.
What happens when you set your iPhone camera’s HDR feature to “on?”Oftentimes, HDR images look crisper, and colors appear much richer than the normal photo. HDR is a great tool for improving exposure (the amount of light and dark in an image), and in this article you’ll discover how to get the most out of HDR photography on your iPhone. You’ll discover how and when to use HDR, and how to achieve amazing exposure in your landscape photos.
For example, say you’re taking a picture of a lighthouse against a blue sky. You can focus and properly expose the lighthouse or you can focus on the sky. One or the other will appear accurately but not both. It will either appear as though the sky is washed out (overexposed) or the lighthouse is but a dark shadow. HDR combines multiple exposures so that both the sky and lighthouse are properly exposed, meaning that both are properly lit and the contrast levels of the photo are balanced.
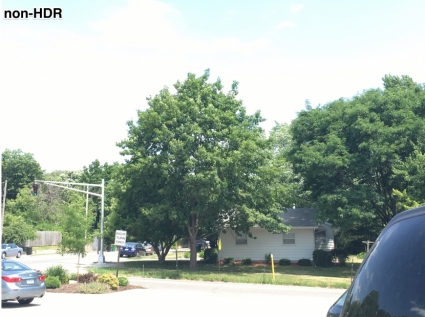
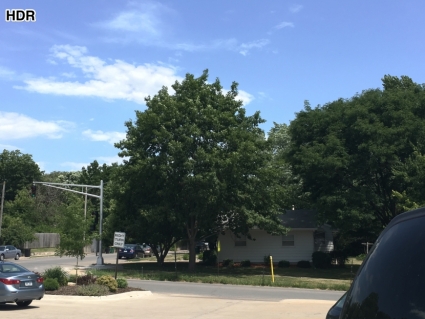
HDR is best used to balance high-contrast scenes. Some examples of situations in which to use HDR:
Landscapes. The sky and the land have a lot of contrast between them. HDR is capable of capturing the light of the sky and the dark of the land in one shot that doesn’t make either the land too dark or the sky overexposed.
Objects in Direct Sunlight. Sunlight casts shadows creating a wider range of contrast in a photo. Using HDR brings balance to all the elements both light and shadow.
Scenes with Backlighting, without flash. The same principle as above applies to the reverse situation. If you have a scene that’s bright in the background, HDR will lighten the foreground without making it look overexposed and washed out.
Don’t: use HDR for quick, successive snaps.
Don’t: use HDR in bright, sunlit conditions.
Don’t: use HDR for moving objects or when you are moving.
To set your iPhone to either save both the normal and HDR photo or just the HDR photo,
Open Settings.
Tap Photos & Camera.
Scroll down to HDR (High Dynamic Range).
You’ll see the option to Keep Normal Photo.
Toggle it on to save both the HDR photo and the non-HDR photo.
Toggle off to save only the HDR version.
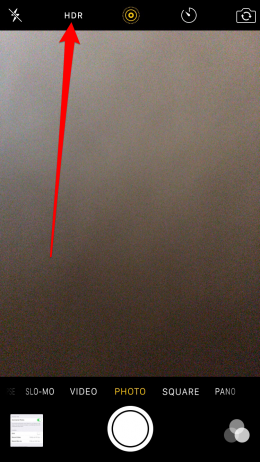
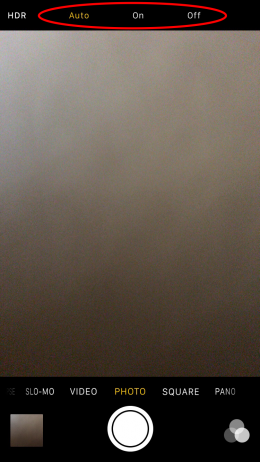
On the iPhone, HDR mode is easily turned on, off, or set to auto within the Camera app. To use HDR on iPhone: Open your Camera app > At the top, tap HDR > Choose On to leave HDR on and Auto to let the camera decide when it’s necessary. When HDR is enabled, you’ll see a yellow box that says HDR near the bottom of the screen. After taking photos, the photos will automatically save to your Camera Roll.
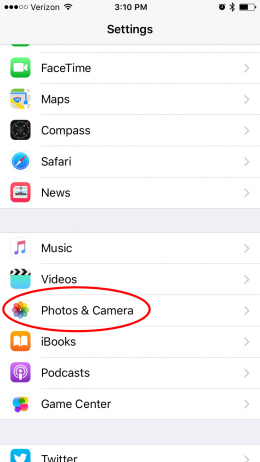
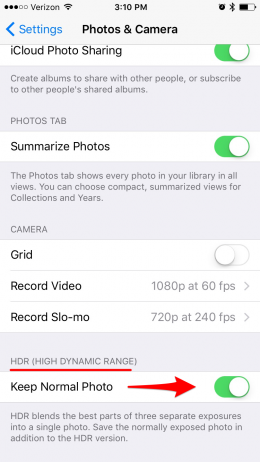
You view HDR photos on iPhone the same way you view any photo on iPhone. Once you take your picture,
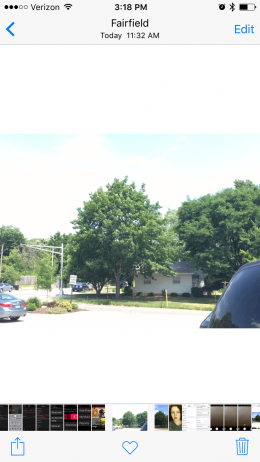
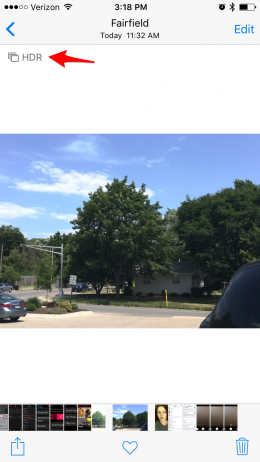
Open the Photos app and select Camera Roll.
If you have the Keep Normal Photo setting on, you’ll see both the normal photo without HDR and the HDR picture. Photos that are HDR will say so in the top left corner of preview.
HDR on iPhone has been around since the iPhone 4 and iOS 4.1. So if you have an iPhone 4, iPhone 4S, iPhone 5, iPhone 5S, iPhone 6 or 6s, iPhone SE, or if you’re planning to get the iPhone 7 — it’s highly unlikely you’d have an iPhone without HDR. As far as software goes, if you’re running iOS 7, iOS 8, iOS 9, or iOS 10, then I’m sure you’ll have no problem finding HDR mode in the camera app on iPhone.
Read More Tips:
How to Upload iPhone Video to YouTube
Solutions to Fix WhatsApp Problem on Android
How to Recover Deleted Photos from iPhone
How to Recover Photos and Videos from Water Damaged iPhone
comments powered by Disqus