
iPhone Data Recovery


The easy 1-Click phone to phone data transfer to move data between iOS/Android/WinPhone/Symbian
Restore-iPhone-Data Products Center

 Android Data Recovery
The Easiest Android data recovery software to recover Android lost or deleted Files
 Phone Manager(TunesGo)
Best iOS/Android phone manager tool to manage your phone’s files in a comfortable place
The easy 1-Click phone to phone data transfer to move data between iOS/Android/WinPhone/Symbian

iOS Toolkit
A full solution to recover, transfer, backup restore, erase data on iOS devices, as well as repair iOS system and unlock iPhone/iPad.

Android Toolkit
All-in-one Android Toolkit to recover, transfer, switch, backup restore, erase data on Android devices, as well as remove lock screen and root Android devices,especially Samsung phone.
[Summary]: Want to know if you need to back up your iPhone and iPad before updating to iOS 13? This article describes three different ways to back up your iPhone and iPad before upgrading iOS 13.

It’s important to keep the latest state of your iOS device software, why? Keeping the latest state of Apple device software not only gets all the cool new emoticons in the update, but also because Apple has been making all the security updates, and recently fixed bugs on iOS 13.
We can’t wait to update to the latest iOS 13 system, but anything is risky, and we need to learn how to avoid risk. There is always a risk of data loss when upgrading iOS system, and the latest iOS 13 is no exception. Therefore, it is very important to back up your iPhone or iPad before upgrading to iOS 13. If these still can’t convince you, here are some specific reasons why you need to do this.
Your file may disappear forever due to an iOS 13 update error.
Some files may be accidentally deleted before the iOS 13 update.
The iOS 13 public beta may cause your device to be unstable.
After the update, your iPhone/iPad device is stuck in recovery mode, white apple logo screen, black screen of death, verifying update, etc. The phone is not responding.
In response to these situations, our recommendation is that prevention is better than cure. Therefore, you’d better back up your device before updating iOS 13. In the following tutorial, we are going to show you three ways to backup your iPhone/iPad data before upgrading to iOS 13 in detail. If you plan to update to iOS 12/11/10/9, you still need to back up your device in advance.
Many times, iTunes is your first choice for backing up your iPhone before upgrading your iOS system. Its process is simple:
Step 1. Insert your iPhone/iPad device into your Mac or PC.
Step 2. Run iTunes and select the iPhone icon in the top left corner.
Step 3. Click the Summary tab and scroll down to the Backup section.
Step 4. Click the “Backup Now” button and wait for the backup to complete.

Note: Open iTunes Preferences and select the Devices tab. If the backup is successful, you will see it listed there. This method is used to verify that the backup is valid.
iCloud is also a way to back up the iPhone, but it has obvious limitations. By default, iCloud gives you 5GB of free storage. Once the capacity is insufficient, you can choose to delete the data to free up the memory or increase the capacity on a monthly basis: 50 GB – $1 per month; 200 GB – $3 per month; 2 TB – $10 per month. Here are the specific steps for how to back up your iPhone data to iCloud.
Step 1. Navigate to Settings >> iCloud >> Backup, then slide the button to the right, you can have a look at the following pictures.

Step 2. Click “Back Up Now” and the backup file will be stored in cloud.
Note:
1. Make sure the device is on a Wi-Fi network, and for best results, it’s best to connect the device to a power source (this may take a while).
2. Assuming your iOS device is plugged in and connected to a Wi-Fi network, it will automatically back up to iCloud as you have not turned off iCloud Backup function.
In fact, in addition to iTunes and iCloud, we can back up your iPhone and iPad before updating to iOS 13 in a variety of ways. iOS Data Backup & Restore is a powerful assistant that you can use to selectively back up your iPhone, iPad and iPod touch data, including messages, contacts, photos, notes, call logs, videos, audio, reminders, Kik/WhatsApp/Viber messages and all kinds of documents without overwriting original data on iOS devices. Besides, you can easily preview and select some particular data you want to restore from iOS backup files. The program supports all popular iOS devices, such as iPhone XS/XS Max/XR, iPhone X, iPhone 8 and 8 Plus, iPhone 7 and 7 Plus, iPhone 6s and 6s Plus, iPad and iPod, etc and supports the latest iOS 13 system.


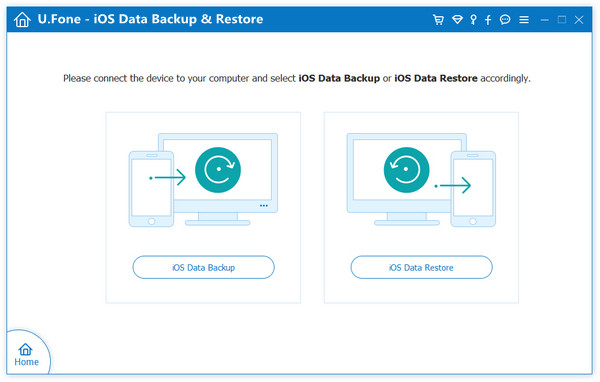
Launch iOS Data Backup & Restore homepage to choose “iOS Data Backup & Restore” feature on PC. Then connect your device to PC. If it asks you to tap Trust to get connected, please follow it.

Next, select “iOS Data Backup” if you want to backup your iPhone to the computer.
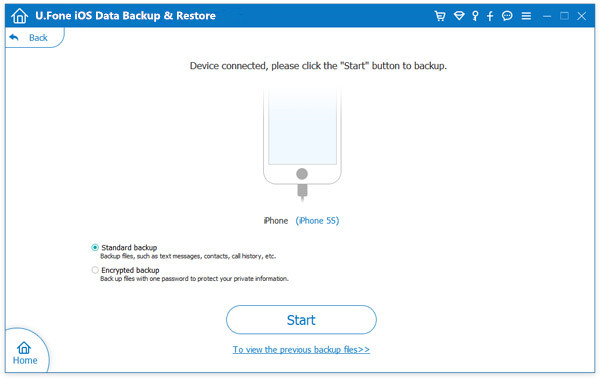
There are two option for you: “Standard Backup” and “Encrypted Backup”. If you tend to protect the data on your iPhone, here suggest you to tick “Encrypted Backup” which will require you to set a password for the backup. Click “Start” button to start the backup process.
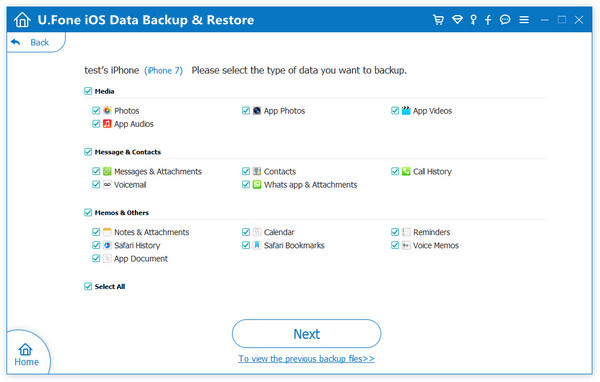
The data that you can deal with is showed on the screen so you are able to select what you what to back up now, including Messages, Contacts, Call History, Line/Viber/WhatsApp/WeChat/Kik Attachments, Photos, Videos, Note, Calendars, Reminders, and so forth.
Now the software start to backup all selected data to the computer,during the back process,please be patient and keep connecting your iPhone with the computer.
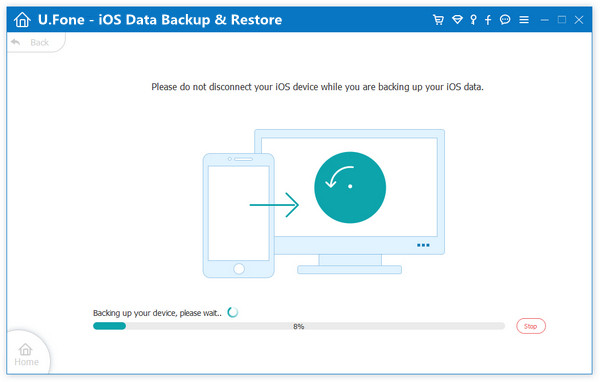
Once the backup is successful, you can easily view the backup specific information by click “View Now” button.

How to Fix iPhone Stuck in Recovery Mode When Upgraded to iOS 13
Ways to Recover Lost iPhone Photos after iOS 12.1/13 Update
How to Fix iPhone/iPad iOS System to Normal (iOS 12/11/10/9)


