iPhone Data Recovery
 Phone to Phone Transfer
The easy 1-Click phone to phone data transfer to move data between iOS/Android/WinPhone/Symbian
Restore-iPhone-Data Products Center

 Android Data Recovery
The Easiest Android data recovery software to recover Android lost or deleted Files
 Phone Manager(TunesGo)
Best iOS/Android phone manager tool to manage your phone’s files in a comfortable place
 Phone to Phone Transfer
The easy 1-Click phone to phone data transfer to move data between iOS/Android/WinPhone/Symbian

iOS Toolkit
A full solution to recover, transfer, backup restore, erase data on iOS devices, as well as repair iOS system and unlock iPhone/iPad.

Android Toolkit
All-in-one Android Toolkit to recover, transfer, switch, backup restore, erase data on Android devices, as well as remove lock screen and root Android devices,especially Samsung phone.
”I’m very disappointed with WiFi not working on my iPhone after updating to iOS 10. You know how it feels when you so eagerly want to watch videos online but your iPhone simply refuses to connect to WiFi. I feel very desperate because I can’t figure out why my iPhone 6S isn’t connecting to WiFi. Can you help me?”
iOS 10 comes with ton of new features and improvements, but sadly, likely any other major iOS software update like iOS 9.3.5/9.3.3/9.3/9/8, it comes with its own sets of problems. Ever since its release, the latest iOS 10 has created many problems for iDevice owners. Some complained that AirDrop is not working; the hackers can bypass passcode; iMessage not working was also a major problem; others were tangled into fixing iOS 10 Update Stuck At “Slide to Upgrade” Screen; and slow performance of iOS 10 annoyed almost all users.
Now, people are facing after updating their iPhone/iPad to iOS 10 is Wi-Fi connectivity problems. The issues being reported include not being able to connect to a Wi-Fi network, getting incorrect password prompt, Wi-Fi settings grayed out, dropping connection intermittently or speeds being extremely slow. The iOS 10 wifi problem has caused various concerns among users. Before taking your iPhone/iPad device to a repair center, this post will offer a number of effective solutions to fix Wi-Fi connection problem with iOS 10 and there is no problems with internet connection in your area.
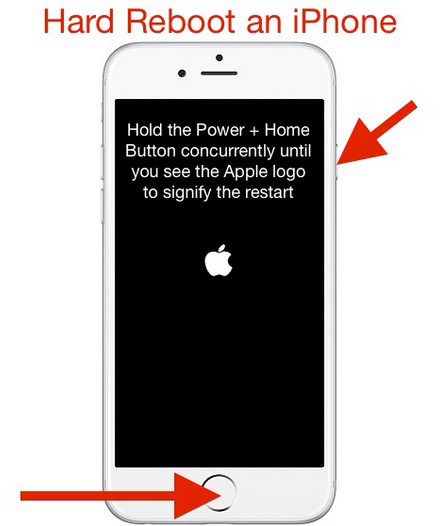
Every time something happens to your iPhone, including the WiFi connection problem in iOS 10 , the first thing that you should try is to reboot your device: Hold down the Sleep/Wake button and the Home button at the same time for at least ten seconds, until the screen goes blank and Apple logo appears. Or you can try to reset the router by turning it off for 30 seconds and then turning it on again. If you still happen to find WiFi not working, try the next solution.
Many users have reported that they’ve solved their issues by resetting the network settings on their iDevice with iOS 10: Go to Settings > General > Reset > Reset Network Settings. Note that this behavior would erase your current cellular and WiFi network settings, WiFi password and VPN settings.

If the above steps don’t work, you can try forgetting WiFi network and then reconnecting it: Launch Settings > Tap on WiFi > Tap on the name of your network > click on “Forget this network” and “Forget” to confirm. After this, you can enter the password again to rejoin your WiFi. This step may help resolve WiFi not working in iOS 9.3.35, 9..3.3, 9.3, 9, 8, etc.

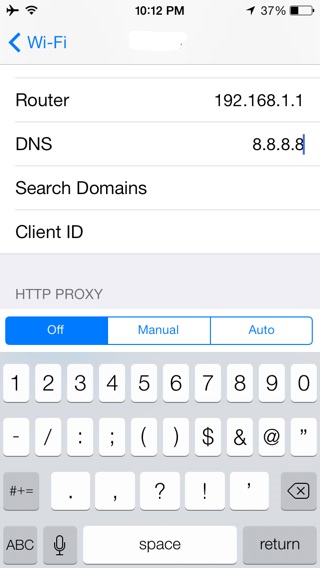
Sometimes wifi problems are as a result of failing ISPs DNS server or problems with the same. When this happens, you can switch to OpenDNS or Google DNS:
Head to Settings -> WiFi;
Tap on your WiFi network. Tapping gives info about IP Address, Subnet Mask, DNS and Router of your WiFi network;
Type Google DNS in Primary DNS i.e., type in 8.8.8.8. In Secondary DNS, type in 8.8.4.4. This should be typed as 8.8.8.8,8.8.4.4 – Primary DNS followed by Secondary DNS separated by the comma. If you choose to use OpenDNS instead, type in 208.67.222.123, 208.67.220.123.
If none of the above tips works, you have the last way to fix your WiFi not working issue: restore your iPhone to factory setting and set it as a new one. Restoring iPhone consists of three main steps – Creating backup, erasing all data and restoring the data.
The feature “iOS Data Backup & Restore” in iOS Toolkit can help you backup and restore data from iPhone 7/6S/6/5S/5/4S/4 in iOS 10/9.3.5/9.3.3/9.3/9/8, such as Contacts,Messages,Call history,Notes,Photos,Video,Calendar,Reminder,WhatsApp messages,Safari’s bookmark and App’s photos,App’s video,App’s documents, like WhatsApp, Line, Kiki, Viber.
Free download the iOS Toolkit for Windows or Mac:
Step 1.Connect Your Device to the PC
You need to download the program and connect your iDevice to PC, a window will be shown as following. Select “iOS Data Backup & Restore” option from “Mote Tools”.

Step 2.Select Data to Backup
The software will automatically detect your iOS device by selecting the “Backup” option. Now you can select what file types to backup and then click on “Backup” button.
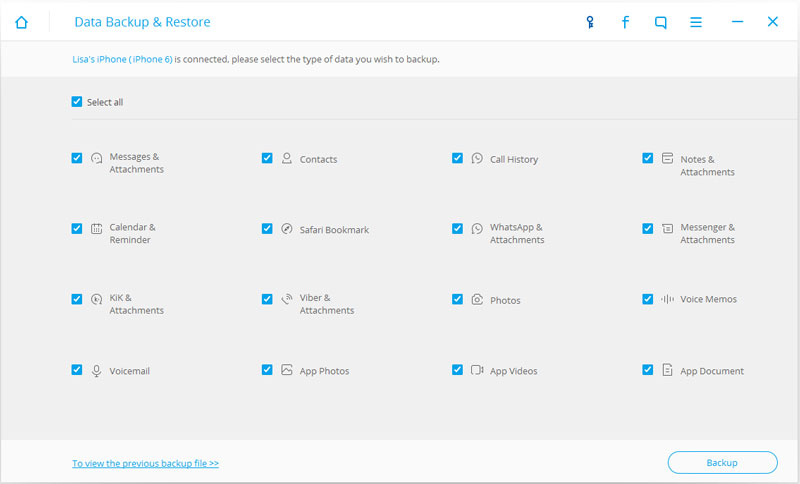
After that, the program will scan your iPhone data, this process will take a few minutes.

Step 3.Successfully Backup iPhone Data to Computer
When scanning is over, all the data of iPhone 6s can be found in the scan result. On the left side you can see the categories. Click “Export to PC” button to export the backup files to computer.
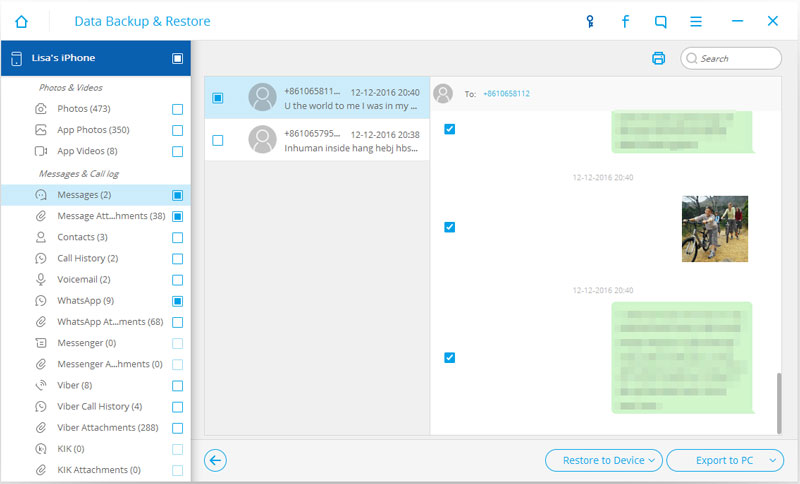
Download the iOS Toolkit and beign to make your iPhone data backup:
If Find My iPhone was turned on before your iPhone was disabled, you can wipe everything on your iDevice by using iCloud:
1. Log in with your Apple ID and password
2. Choose your iPhone from All My Devices dropdown menu
3. Choose Erase iPhone
4. Continue to the next section after erasing is done
After successfully backing up data from iPhone 7/6S/6/5S/5/4S/4 to computer, you can use this iPhone Data Recovery software to restore backup files to your iDevice in iOS 10/9.3.5/9.3.3/9.3/9/8. What’s more, you can also use this iPhone Data Recovery to directly bring back missing photos, contacts, messages, notes and more or from iTune/iCloud backup. After you select the files you need, just click “Recover to Device” button to restore all files to your iPhone 7/6S/6/5S/5/4S/4 or iPad device.

Read More: How to recover lost data from iPhone in iOS 10
In this guide we collect the potential solutions to iPhone iPad Wi-Fi problems in iOS 10 so that you can fix any kind of iPhone iPad wifi not working problem.
Related Articles:
Best Solutions to Fix iPhone Black Screen Efficiently
[Fixed]iOS 10 Update Bricked a iPhone
How Do You Block Annoying Calls, Text Message (SMS) Spam in iOS 10
How to Download and Update to iOS 10 Without Data Loss
How to Factory Reset iPhone without Passcode
2 Ways Fix Personal Hotspot Missing issue on iPhone/iPad after iOS 10 Update
comments powered by Disqus